
In my automotive life, I’ve gone from 8,000 hp to 111 hp, from a jet-powered dragster to a ’92 Defender 90 200 Tdi.
Here’s how it happened.
I spent my childhood on a Quarter Horse farm in Madison, ME, where helping my family work on their equipment indoctrinated about things mechanical. Once I got my driver’s license at age 15, my interest shifted from tractors to cars, and I started drag racing at my nearest track, Winterport Dragway.
Once bitten, I knew I wanted to become a race car driver; I learned quickly that the chance of that happening without a ton of cash was remote. I set that goal aside and earned an engineering degree in power generation at Maine Maritime Academy. Upon graduation, I took a position at the Seabrook Nuclear Power Plant in Seabrook, NH.
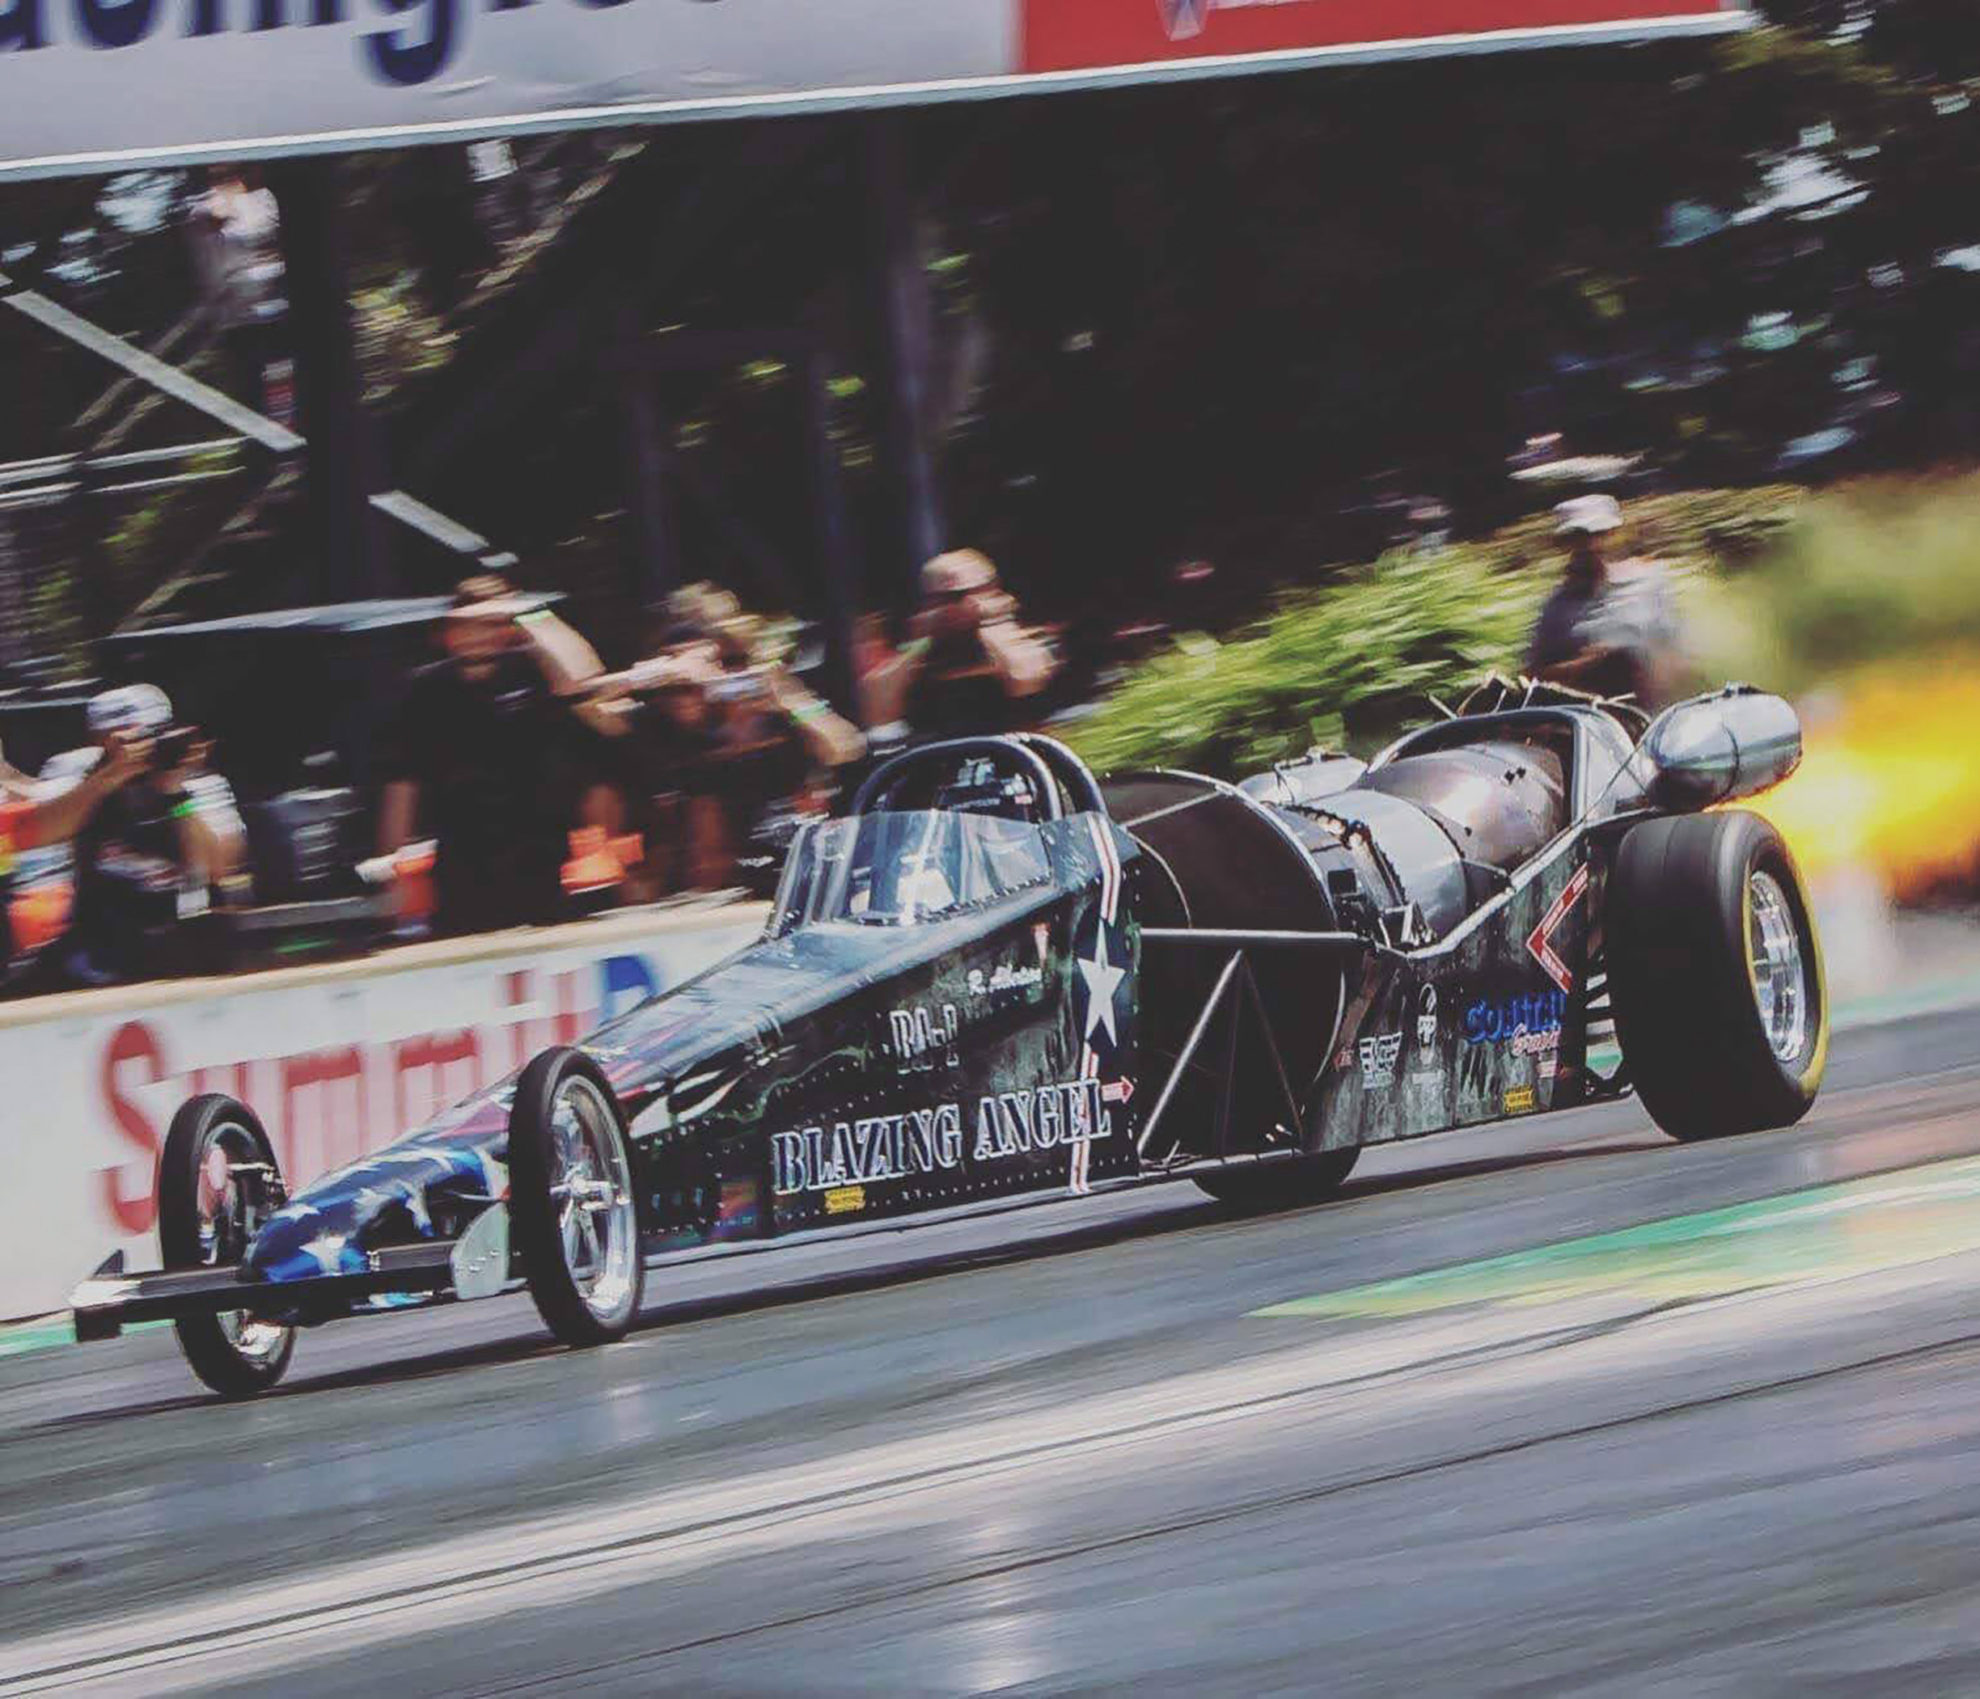
Fortune smiled on me as that border region of Maine and New Hampshire included the New England Dragway in Epping, NH, as well as Oxford Plains Dragway, Oxford, ME. Happily, I found success as a drag racer and moved from an obsessed amateur to a professional drag racer, organizing my own team without having to jockey for corporate sponsorship. I raced everything from Bracket Cars [Production cars over longer distances -ed.] to Pro Modified [Production cars with substantial modifications -ed.] to jet turbine powered dragsters. My jet dragster, “Blazing Angel,” hit 308 mph in the quarter-mile at the New England Dragway.

The Covid pandemic limited all racing activities, so I decided to spend less time racing and more time with my family. My son Micah and I worked on a Nissan 240 SX together. My daughter, Charlotte, competes in national dance competitions, which I enjoy attending but which seem to require the same levels of time and expense as drag racing.
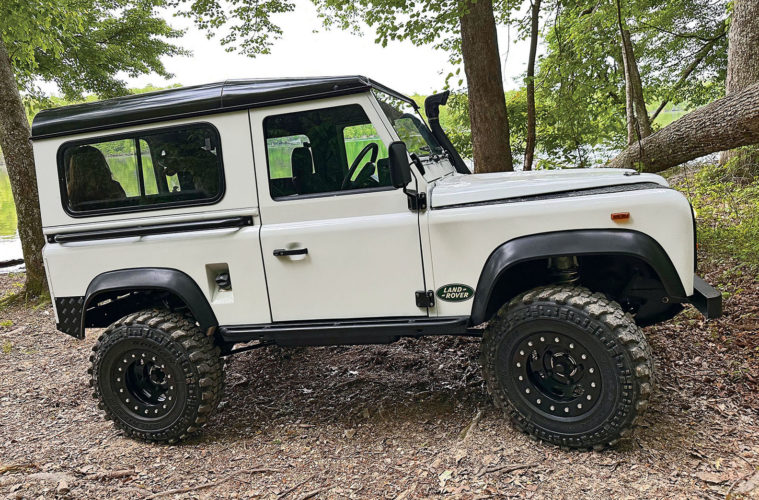
While I had built several race cars and street rods over the years, I had always liked the look of Defenders as they brought me back to my farm tractor roots. In May 2022, I purchased a ’92 Defender 90 project in Nashville, TN. A British gentleman had imported it from the UK in 2017. I chose this Defender because it was only 150 miles from my home in Soddy-Daisy, TN, and for the most part, seemed mechanically sound. Based on my research, its 200 Tdi engine offered a better driving experience than the previous 2.5 or 2.25 diesels. Once home, it passed my 100-mile test drive. which reassured me that I could now begin the refurbishment project.
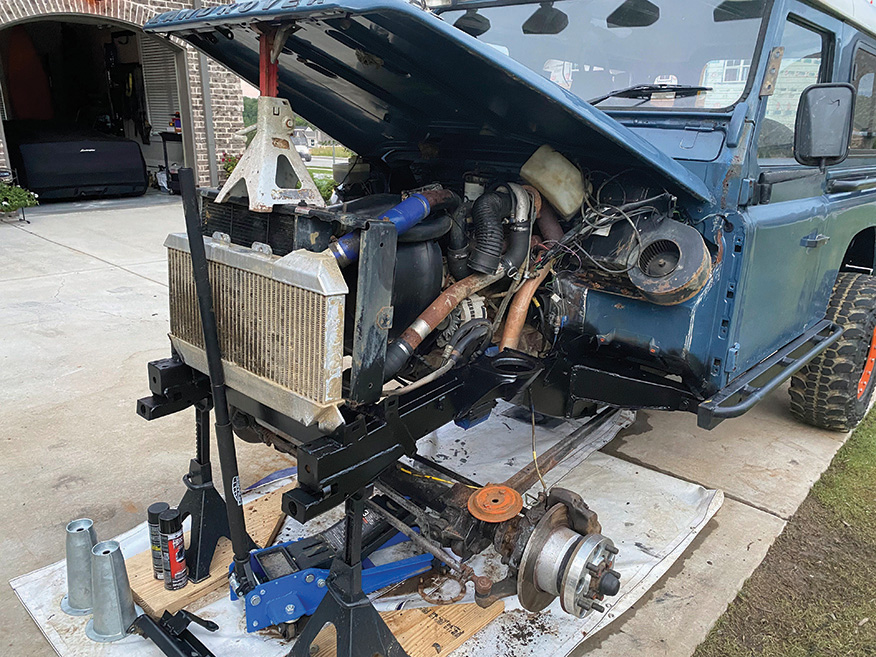
Although I knew it needed structural work, the racer side of me wanted to ensure that it ran properly. It would occasionally start hard and exhibit some fuel leakage, so I dove into the fuel system. I swapped out the lift pump, replaced all the drain lines, and the lines from the tank to the injection pump. Based on previous experience on mechanical-injected diesels, I also adjusted the wastegate to up the boost. This made a world of difference in drivability and power with minimal increase in smoke production. The LT77 transmission shifted well, and the previous owner had installed a new clutch just prior to my purchase. Aside from fluid changes, I left the gearbox untouched.

With the vehicle now running the way it should, I started from the ground up. The axles had some seepage, so I replaced the seals and changed out the differential gear oil. The front differential case had a crack. I welded it up and installed a differential guard. I replaced all outriggers and shock mounts and upgraded all the bolts / fasteners. Removing the tired suspension pieces allowed me to media blast the frame, repair rusted pieces, and then then apply prevention against rust. I used a multi-step process that involved etching the metal and applying POR-15 onto the entire chassis. A UV-resistant top coat would ensure it would look good for a long time. Next I stripped all the suspension pieces and pressed in new bushings. I added new +2 Heavy Duty Springs and Terrafirma Expedition oversized shocks with all new hardware. At this time I also rebuilt all the front steering components, which improved the on-road experience.
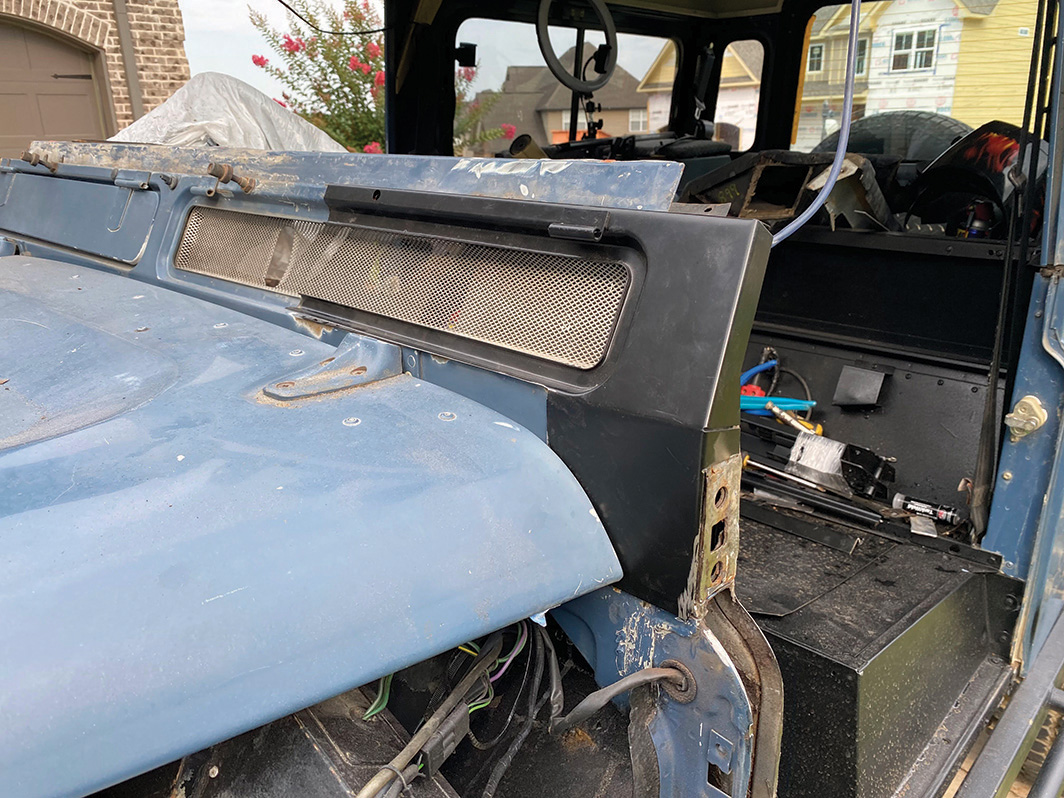
With the mechanical upgrades and frame restoration complete, it was time to attack the cosmetics. During the frame as restoration rebuild, much of the body had been disassembled, as was the interior of the vehicle. This process had exposed years of less than stellar repairs which needed to be taken care of the right way. All this while not throwing money away and reusing as much of the factory panels as I could. The rear tub of the Defender was in the best shape and essentially just required a hammer and dolly to remove dings and dents followed by light coat of filler to make for a smooth surface to apply paint. The bulkhead and front wings were a different story.
First, I set my sights on the bulkhead, media blasting all the old paint away. This exposed old repairs that used silicone and JB Weld, which allowed water to get trapped inside and corrode part of the upper bulkhead. It took some time, but I cut out and replaced all the deteriorated metal, then applied a rust-prevention coating. I re-skinned the entire upper bulkhead with all new metal around the vents, cut out and replaced metal on the sides of the bulkhead, and reinforced the door mounting locations. Without question, this challenging work consumed the most time of the entire refurbishment.
Next came the footwells and the front fenders. One of the wings had a substantial dent hidden under body-filler paint. I removed all the old filler and, with a hammer and dolly, could shrink the metal back such that only a thin coat of filler for paint prep.
At this point in the project, I decided to purchase new galvanized skin doors. (I could have reskinned them, but the time and effort to patch the door frames and re-skin would not have resulted in savings.) I chose IKEA-style door kits, from door hardware to internals, that I
had to assemble myself – but that allowed me to paint everything and reduced the total cost. New window glass and door seals went in afterwards.
Not having a dedicated shop, I converted one of my garage bays into a makeshift spray booth using plastic sheeting, furnace filters and an old fan. I started with plastic from floor to ceiling and used the furnace filters and fan to aid in the correct airflow for paint. As I didn’t have much space, I had to paint in several stages. First I masked off the rolling tub beginning with a primer, then block sanding and sealing. Charlotte asked to change the color from Arles Blue to white, and we chose an Arctic White – not a stock color, but when your daughter asks, you comply. After drying for a few days, we rolled it outside to work on the doors, fenders and top.
To paraphrase the Haynes Manual, reassembly was the opposite of disassembly. Not surprisingly for a hand-built vehicle, it required plenty of tweaking and adjusting to get everything to fit just right.
Turning to the interior, I spent considerable time repairing hacked-up wiring. Next came the fascia pieces; I recoated the uppers and lower dash panels and sourced replacements for missing plastic items. The stock seats, while requiring a significant cleaning, felt firm and looked sound. Rather than buying a carpet kit and headliner, I created my own using homemade templates and fabric.
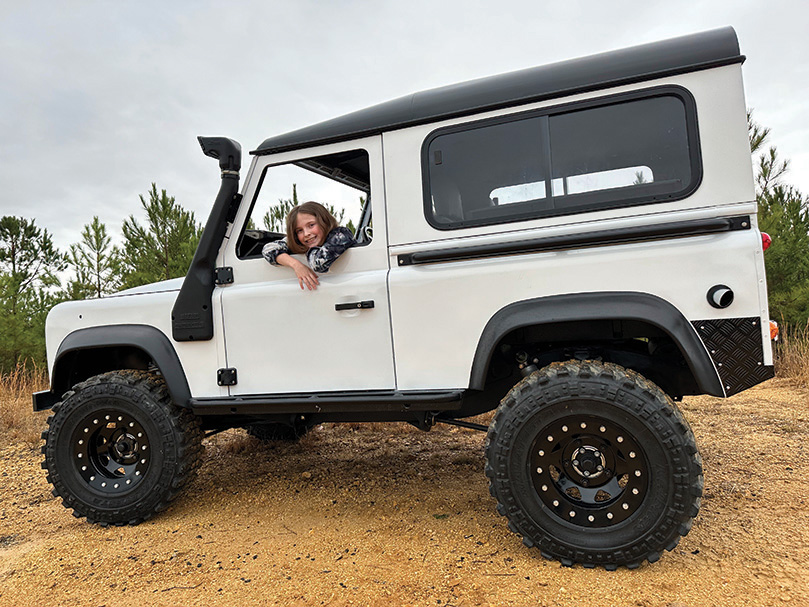
I chose to retain the old-school light fixtures but replaced all the bulbs and lenses. The existing rock sliders and bumpers received protective coating. The steel bead-lock wheels, with their Malatesta Kaiman tires, were stripped, painted and then extended using one-inch spacers. The last pieces of the puzzle were the new window glass and grill.
A good number of enthusiasts farm out all or portions of a refurbishment like this one, but I’m proud to have completed all the work in my two-car garage. Yes, I have a vehicle with 7,889 less horsepower than my jet slingshot, but happily, this Defender returns me to my days with tractors on our farm; the trade-off is well worth it.