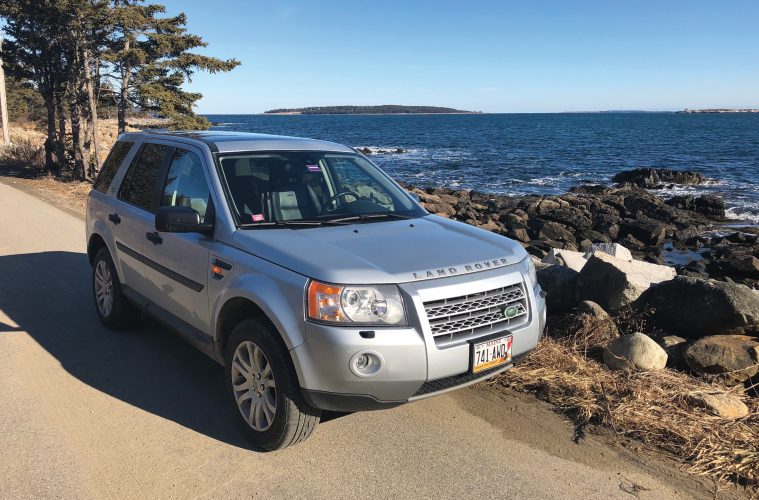
Last year I returned from a Land Rover event and decided to stop at a supermarket before boarding the ferry to the island. As expected, I didn’t recognize any of the other shoppers, but the hat on one of them — a classic Rovers North cap — caught my eye. I stopped the wearer — who was understandably perplexed — and asked if he actually owned the hat. Yes, said Eric Schweikardt, a photographer who had moved to nearby Tenant’s Harbor, ME. Eric’s current Land Rover is an ’08 LR2, with 124,000 miles on it. We shared a few moments of happy times spent in an LR2. As we traded contact information, Eric kindly said he hoped we might get together.
This winter he surprised me with a call for help one late afternoon. You know someone is desperate when a Series owner and devotee gets a call about a modern Land Rover. Eric had parked his LR2 at another store and said, “When I went to start the car, the brake pedal felt rock solid as it were locked in place. Even though the key was inserted into its slot, the steering wheel remained locked. Tugging the wheel to one side did noting. I tried turning it while pressing the starter button, but the car would not start — nothing happened when I pushed the starter button!”
I ran through the usual suspects – the brake light switch [brake lights worked], dead battery [no alternator light on when driving to the store, lights and horn worked], even removing the key and reinserting it. Eric could sense how little assistance I could provide and had the LR2 towed to a local auto shop. The next morning, the shop did nothing to the car but insert the key and push the starter button. It started right up, many consecutive times, and it has continued to do just that this winter.
We know the newer Land Rovers require more powerful batteries than earlier models and that they can be quite finicky when driven with a barely functional battery. If you’re an LR2 owner and have experienced this problem, Eric’s looking for an answer.
This incident certainly proved the LR2 a true Land Rover.
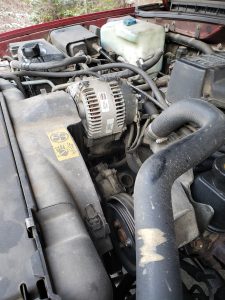
On a snowy morning I’m driving “Gilroy,” my ’97 Discovery 1 SE7, down a narrow road on a remote end of my island town. While heading downhill I notice the alternator warning lamp light up, the tachometer stop functioning altogether and the steering becoming quite heavy. Crossing a bridge over a cove, I see the temperature gauge rising past its usual half-way and heading towards the red. I pull off the lane into a clearing and open the hood.
 Through the snowflakes it’s clear that the serpentine belt has slid off the multiple pulleys, but it does not appear to be broken. I check the pulleys at the power steering pump, the alternator and the air conditioning unit — all rotate smoothly and quietly. Then I spun the spring tensioner pulley and it wobbled badly. Since the pulley has a smooth rather than a ribbed surface, the wobble explains the belt’s failure to remain in place.
From the clearing, I called Rovers North for a belt and the tensioner unit, but realize that as this occurred on a Friday, the part could not arrive until Monday. With predictions of 12-24 inches of snow over the weekend, I could not delay the repair.
For a shoulder to cry on, I called correspondent Scott Preston, Nashville, TN. I know that he’s dived into the Rover V-8’s like the 4.0L on my Discovery. “It’s a known issue with older high-mileage V-8’s,” he said. “The center bearing in the pulley wears out but is easily replaced.” Sitting in a forest clearing does not seem like the best place for an “easy replacement,” but I take notes as Scott shares his experiential wisdom.
“The tensioner consists of a a bolt-on unit that encases a very strong spring. An arm off the center unit holds a pulley. Unbolt the unit from the block [13 mm socket on my Rover -ed.] and then remove the unit from the Rover. If you turn it upside down, you’ll see a slot on the backside. That’s where you can apply pressure to move the spring and release tension on the spring when you put the belt back onto your Discovery.”
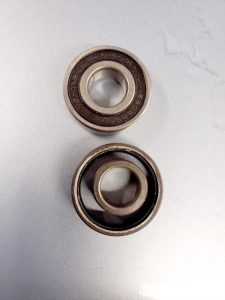
“The sealed bearing is a very common one. [NAPA #P62032RSJ or Duralast 203FF -ed.] There’s a clip on the backside you need to remove and using a socket, you can knock out the old bearing and tap in the new one.” As long as the spring feels strong, there’s nothing else to worry about.”
An islander stopped to help, noting, “I’ve seen your car with the hood up before.” She dropped me off in the village and I hitched another ride to Todd’s Garage, an old-school auto repair shop. No food or snacks, no waiting room, just Todd and Melissa Brown and their dog. Todd took one look at the tensioner and pulley and said, “I probably have a bearing for that. Good thing you have a metal pulley. The plastic ones just have to be thrown away.” I showed him the clip on the back. He removed it, tapped out the old bearing and carefully replaced it with the new one.
 Another friend, Rob Potter, drove me back to the Discovery. Now we confronted how to move the spring tensioner down and to the right. Todd had loaned a handy thin pry bar with at 3/8’ square plug at the bottom. It was thin enough to slip in from behind, but on the left side, the oil cooler lines blocked the bar from getting the best angle for enough travel. Try it from the right-hand side and the alternator blocked its travel. In the end, the only way we could enough pull was to use a 3/8” breaker bar with a 15 mm socket on the front pulley bolt [not recommended!] A box end wrench over the end of the breaker bar provided extra leverage to move the tensioner spring far enough to slide the belt onto the pulley. Mind you, all this happened after several crawls in the snow under the front of the engine to keep the ribbed belts in the flanged water pump and grooved crankshaft pulleys.
Filthy, chilled and wet, I said a prayer and started the Discovery. It fired up without warning lights illuminated and absent scary noises. If “it takes a village,” I thank islanders Todd, Rob, Jeremy, two plumbers and one fisherman who stopped to help, Rovers North and the Land Rover community for “raising” Gilroy.
